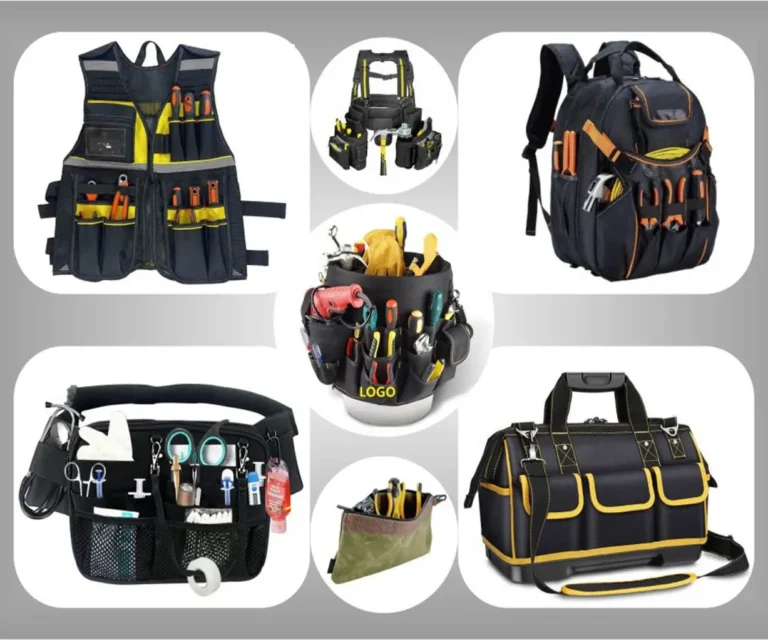
For professionals who work daily with wrenches, drills, and screws, a well-chosen tool pouch and belt system is more than just an accessory—it’s a mobile workstation that boosts efficiency and reduces physical strain. With countless options on the market, how do you select a combination that works in perfect harmony? This guide breaks down the process into three key dimensions, ensuring your gear not only holds your tools but becomes a reliable extension of yourself.
1. Core Compatibility: Ensuring a Secure Physical Connection
This is the first and most critical step, determining whether your pouch will attach securely and stay put on your belt.
1.1 Inspect Your Tool Belt’s Connection Features
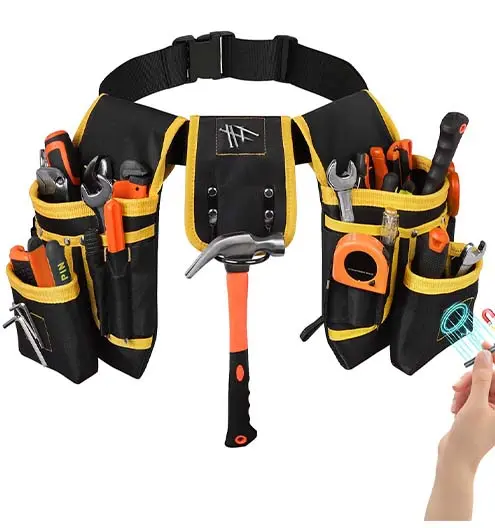
Start by examining your tool belt. Most universal belts feature a standard belt slot, typically 2.5 inches (≈6.35 cm) wide, designed for a pouch’s strap to thread through. Also, check for a MOLLE/PALS webbing system (rows of parallel nylon loops) or D-rings and snap hooks. These are the foundations for modular attachment.
1.2 Match with the Correct Pouch Attachment
Your tool pouch must correspond to your belt’s features.
-
For Belt Slots: Choose a pouch with a vertical slot or strap loop on its back. Ensure the slot width accommodates your belt’s thickness.
-
For Webbing/Attachment Points: Opt for a pouch with MOLLE webbing or dedicated snap clips/hooks on the back. This allows for quick detachment and flexible positioning.
-
For Dedicated Systems: If you use a proprietary suspension system from brands like DeWALT or TOUGH BUILT, the best choice is to purchase pouches from the same brand. This guarantees perfect clip/interface compatibility for one-click attachment and release.
Pro Tip: For work at height or constant movement, always pair your belt with a set of suspenders. They distribute weight across your shoulders and back, dramatically improving comfort during long wear—a standard for professional tradespeople.
2. Capacity Planning: Choosing Size & Layout Based on Your Tools
The right size is not about being bigger; it’s about being smarter. The size and layout of your tool pouch should be dictated by your essential toolkit.
2.1 Take Inventory of Your Daily Tools
List the tools you use every day: screwdrivers, pliers, hammer, tape measure, level, drill bits, various fasteners (screws, nails), etc. Identify which ones need instant access and which can be stored in deeper pockets.
2.2 Select Pockets by Function
A tool pouch is not just “one big bag” but an organized storage system with dedicated zones. Based on your list, look for pouches with these features:
-
Dedicated Tool Loops/Holders: For securing hammers, chisels, etc., preventing them from swinging around or damaging other tools.
-
Tape Measure Slot: Usually an elastic side loop or leather sheath for instant access.
-
Small Parts Pockets: Ideally with multiple dividers or clear windows for organizing and identifying different screws and nuts.
-
Main Compartment & Auxiliary Bags: The main area holds larger tools (like wrench sets), while zippered side pockets secure valuable or small items.
2.3 Beware of “Overloading”
A common mistake is trying to carry every tool on your person. An overloaded belt rapidly increases fatigue and hampers mobility and productivity. Carry only the core tools needed for the immediate task, keeping backups in a nearby toolbox.
3. The Details: Material, Comfort, and Safety
These final considerations determine whether your gear will stand the test of time and tough job site conditions.
-
Material & Durability: Common materials include:
-
High-Density Nylon/Polyester: Lightweight, abrasion-resistant, and tear-resistant—the mainstream choice.
-
Leather (Genuine or Synthetic): Often used for tool loops and high-wear areas. Classic and durable but heavier and may require maintenance.
-
Canvas: Rugged and cost-effective but can be heavy and slow to dry.
Check that stress points (like rivets and stitching) are reinforced and zippers are robust and smooth.
-
-
Ergonomics & Comfort:
-
The Belt: Choose one with a padded liner and an adjustable width/length to fit different body types and clothing layers (from a summer t-shirt to a winter jacket).
-
Pouch Layout: Distribute tool weight evenly on both sides of your hips. Avoid concentrating all weight at the front, which is crucial for balance and lower back health.
-
-
Safety Features:
-
Reflective Strips: If you often work on dimly lit sites or near roads, a pouch with reflective strips significantly enhances visibility and safety.
-
Tool Lanyard Points: For valuable or heavy power tools used at height, consider using tool tethers. Choose a pouch or belt with D-rings or other attachment points to secure the tether, preventing dangerous drops that could damage tools or injure people below.
-